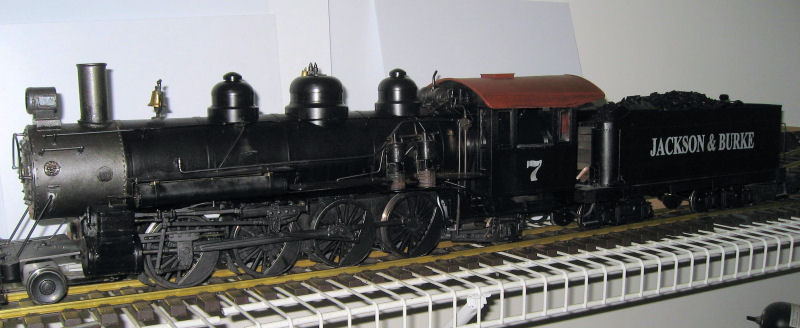
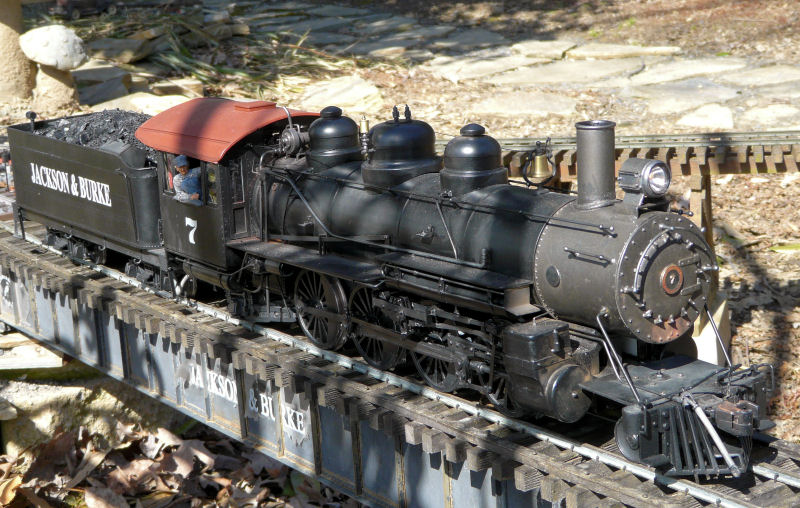
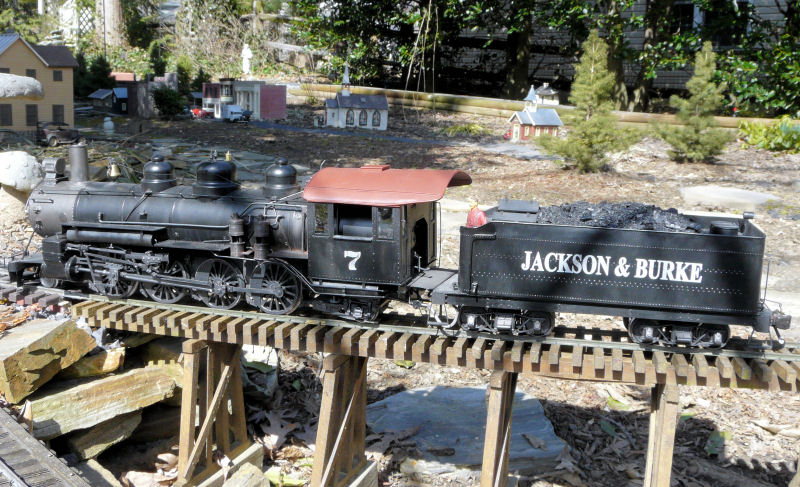
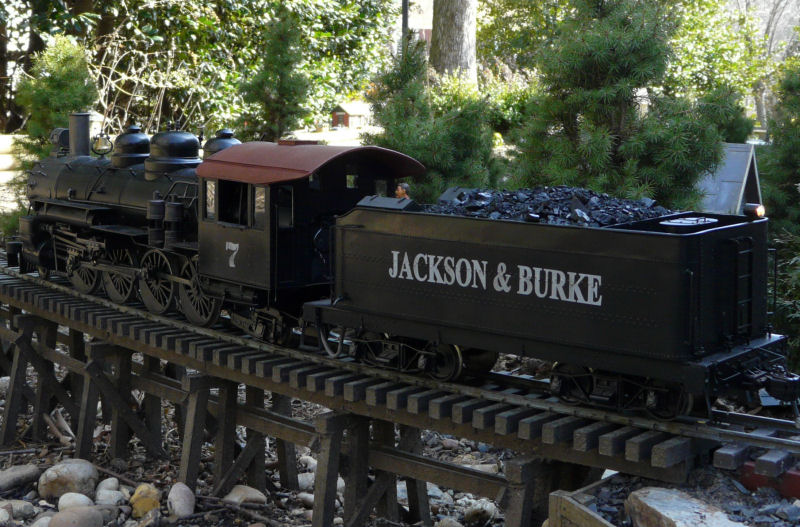
Mikado - JBRR
Main menu:
- Home
- Locos
- Rolling Stock
-
Structures
- All Structures
- Industries
- Off Layout
- Railroad Property
- Town & Country
- Layout
- Vehicles
- Figures
- Events
- Articles
- What's New?
Mikado
When I visited the East Coast Large Scale Train Show in April 2009, Rich Yoder had models of his EBT Mikado on display. They are beautiful models but way above the price I wanted to pay.
I did like the concept of a large Mikado, so I decided to create my own. In April, I purchased an Aristocraft Pacific. It is nominally 1:29 scale; below you can get a comparison with my 1:20 ten wheeler.

The basic plan is to add another driver, build new pilot and trailing trucks, create a new cab, boiler and tender.
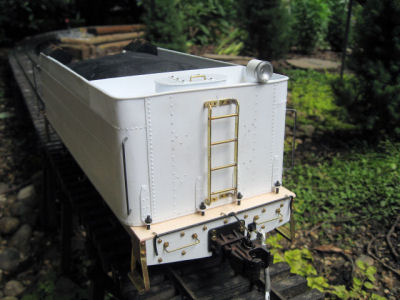
The Tender
I had initially planned to use the tender from an existing locomotive, but after cutting it up I realize it would be more work than started from scratch.
I cut some acrylic for the base and added some 1/2" square pieces to frame it out.
I built up bolsters from more acrylic and some styrene, and then added wood buffers at each end. Welder contact cement was used to glue the wood to the acrylic.
Simulated rivets were added to the sides using small pins.
End details were added, including the coupler, grab irons and working glad hand.
The tender trucks came from a Bachmann Consolidation.
Wood strips were then glued on top of the base.
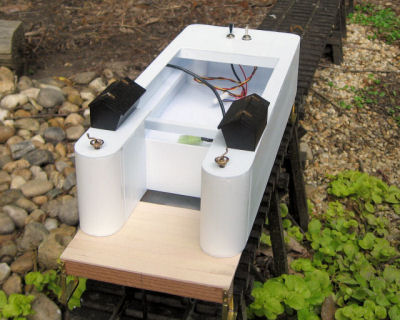
I wanted a working tender water hatch so I could use it to conceal the power and volume switches. I started by laminating 3 pieces of .020" styrene around a couple of tubes I taped together to form a curved base. Next, I cut the lid from some .040" styrene and attached it with some doll house hinges.
I'm not a big fan of detail that you can't typically see, but the brake cylinder on the tender cried out to be modeled as it can be seen from the side. Since I was going to model that, I decided I might as well add a few more visible pieces.
Simulated rivets were embossed on .020 styrene. Needless to say, this is only a tad tedious.
The styrene was then wrapped around the tender inner form and glued in place. The top edges were trimmed with .060” half round styrene. I built hold down cleats from styrene. I used some extra nuts and bolts from some Accucraft couplers for the anchors. The tank spigot was made from some brass tube and a dress snap for the handle. Finally, I used brass strip and rod for the tender ladder. Grab rails were bent from music wire and glued in place.


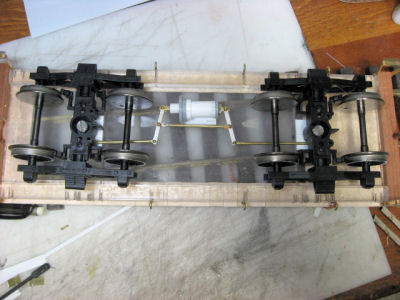


Running Gear
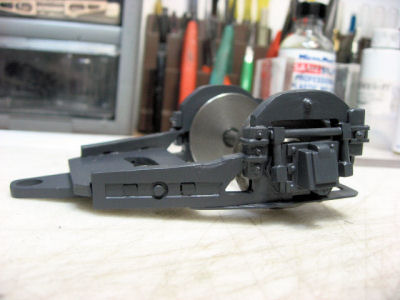
The first part to be done was the trailing truck. I took the existing one and greatly modified it using some brass and styrene bits. The wheel was replaced with a steel wheel from Sierra Valley.
I was able to obtain another driver and gearbox from an older Pacific. I built a holder for it using brass strips and styrene.
I needed to build new steam cylinders and chests. Plastruct not only sells styrene tubes, but the end caps for them as well, thus saving me the trouble of cutting circles to fit. The steam chests are built from some 1/2” foam PVC, with added styrene pieces.
A new pilot was built using strene strips. Steps were created from brass and wood. I was able to use the pilot deck from my Mogul but I did have to build a new truck for the leading wheels.
I wasn’t a big fan of the original rods that came with the Pacific so I cut up a set from the Bachmann Anniversary; I think they have a much less clunky look, but they’re just not long enough. So, I cut them up and left a small tongue on each piece. I soldered them into some 3/64 x 1/4” rectangular tube.
Once done, they are put in place on the drivers. I replaced the Phillips head screws with some hex head bolts. The main rod was built up with some styrene to give it a thicker look.


Valve Gear
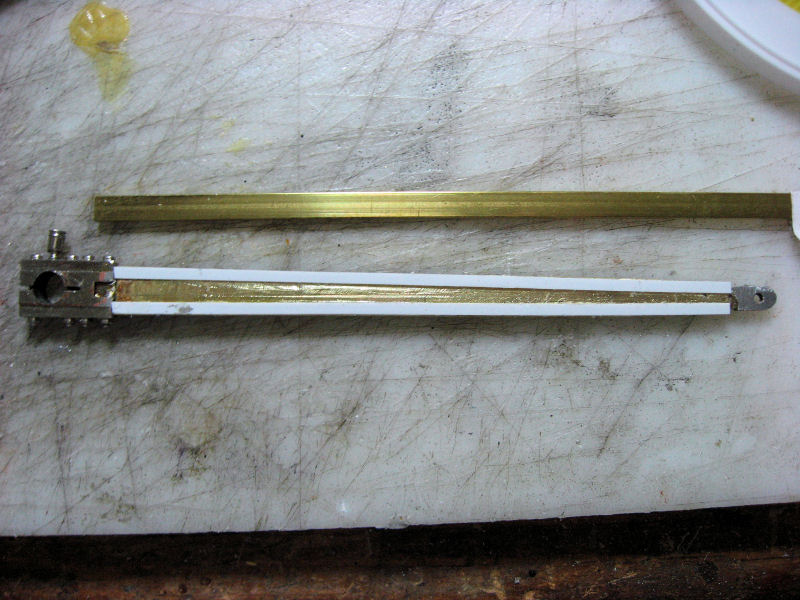
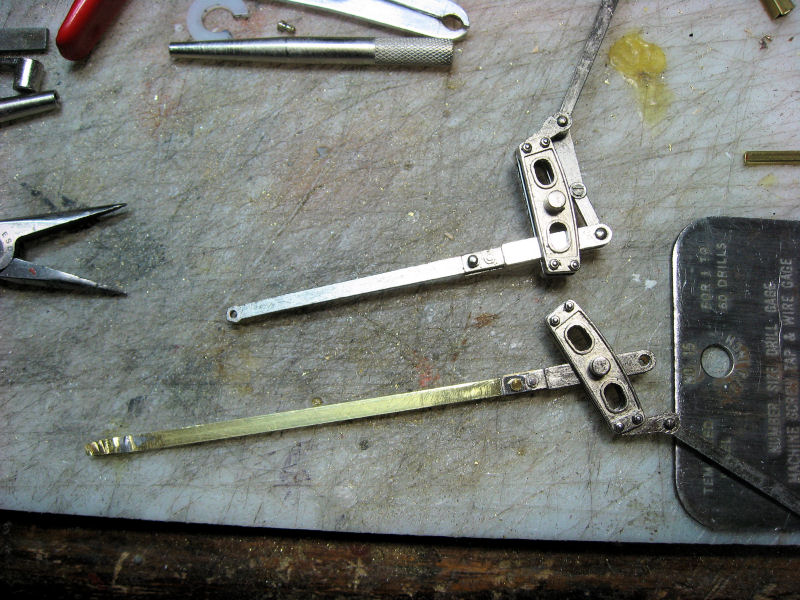
The Mikado uses a Walschaerts valve gear. The Bachmann 10 Wheeler does as well, but most of the pieces are too small to use, so I decided to build my own.
I started with the pistons. I used brass strips and rods, as well as some nuts and tiny hex head bolts. These fit into the cylinders I made earlier and are held in place using some 1/8” square brass rod. They finally slide smoothly.
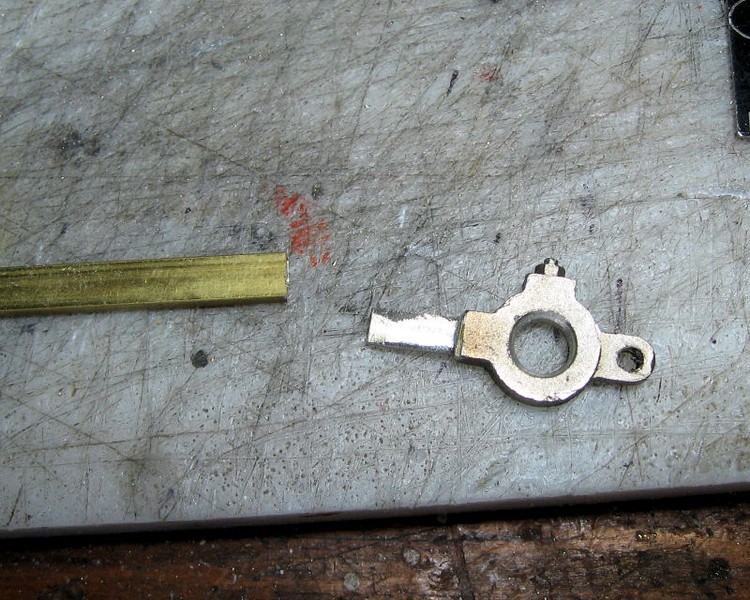
The original Union Link (Anchor Link) from the Bachmann Anniversary is a tad short, as the EBT one is about 2 feet long. I made a new piece using some 1/8" square brass tube. I cut this into 6" sections (scale). Next I ground away about 4" to leave some "fingers". A piece of 1/8" x 1/32" brass bar was used for the main part of the link. I ground some slots in each of the fingers and soldered it in place.
I tried to use the Bachmann parts whenever I could, as they include some nice detail.
Rather than paint the valve gear, I coated it with Neolube. This is a solution of graphite in alcohol. It not only blackens everything, but it also acts as a lubricant.


The Boiler
I ordered an 18" long 3" OD ABS tube from Plastruct. It would not be long enough to do both the boiler and smoke box. But, when I looked around the shop, I saw that I had a piece leftover from when I built the boiler for the ten wheeler. The tubing is 5/64" thick and I calculated that if I cut out a strip about 7/16" wide, that would be just enough to make it so this could fit inside the long boiler tube. I cut it out, filed the edges straight, and then glued it back together using Weldon 16. This now fits inside the long boiler, giving me the look I wanted.
I put the rivets on some styrene and then wrapped it across the smoke box; added builders plate, clean out and headlight bracket. I cut styrene to shape and added some plastic nut/bolt/washer castings. The stack was fashioned from some styrene tubing.
Gary Buchanan had offered to make some appropriate domes for me using the EBT drawings as a starting point. They turned out perfect.
I added some details to the smokebox door; smokebox dogs, number plate and grab iron. I used some narrow styrene strips to model the bands around the boiler.


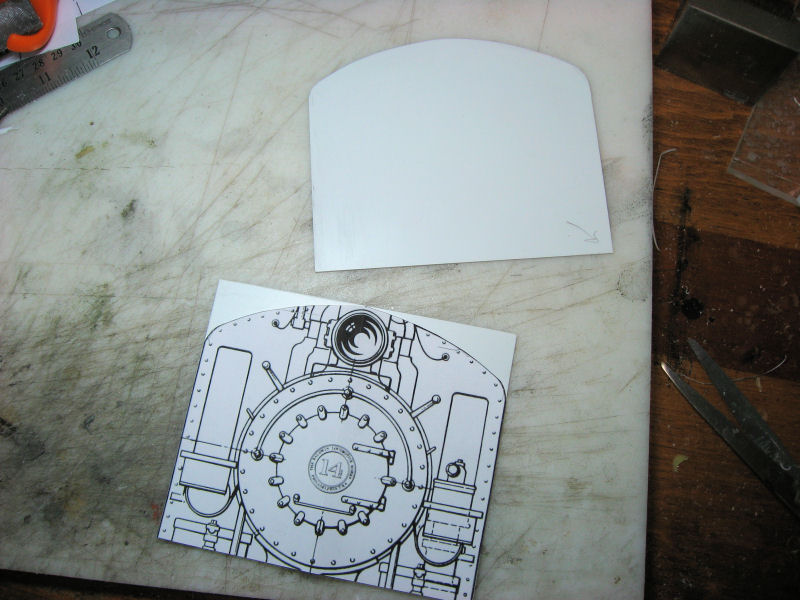
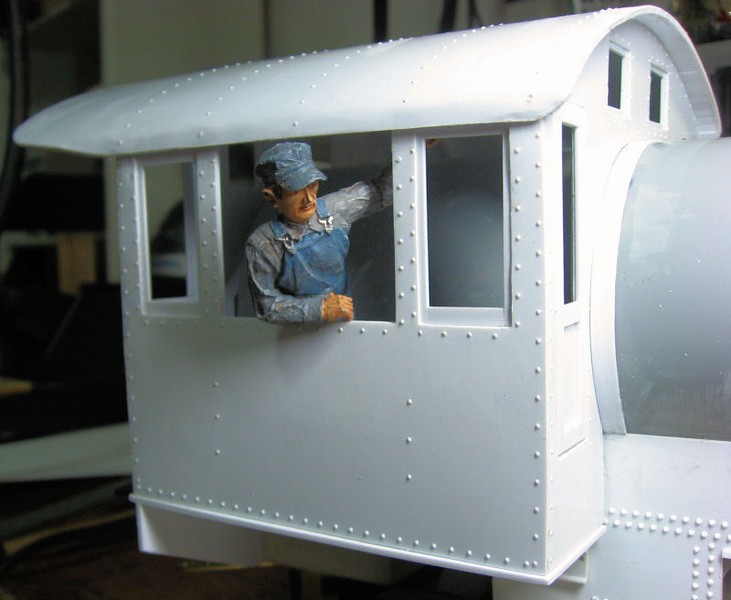
The Cab
To start on the cab I first cut two rectangles out of .040" styrene to size. I printed out a scale drawing of the cab, cut it out and used it as a pattern for the roof curve. Once those were cut, I cut out the openings for the windows.
Rivets were embossed in .020” styrene and the cab was assembled. Doors were made from styrene strips.
The inner roof was created by applying some .040” styrene strips perpendicular to the curved front and back.
The roof was made from .020” styrene cut to shape and embossed with rivets. I glued it to the inner roof using contact cement.
The edge was finished using some .060” half round styrene. I added a rain “gutter” strip, and a roof hatch.
A fire door was obtained from Ozark Miniatures (left), and the backhead came from the Bachmann 10 wheeler. I added some rivets using textured paint. I built a “step” that is used by the fireman to open the doors. Grate shakers (3 on each side of the door) were made from styrene strip.
I used the Bachmann air tanks and attached them to the floor of the cab using some 1/8” x 1/64” brass strips.
I painted the cab using Krylon black satin spray paint for the sides, and Krylon ruddy brown primer for the roof.
I made padded armrests for both sides of the cab, using Magic Sculpt.


Plumbing
When you look at the real locomotive, there are a LOT of pipes. I decided to model only a few of them.
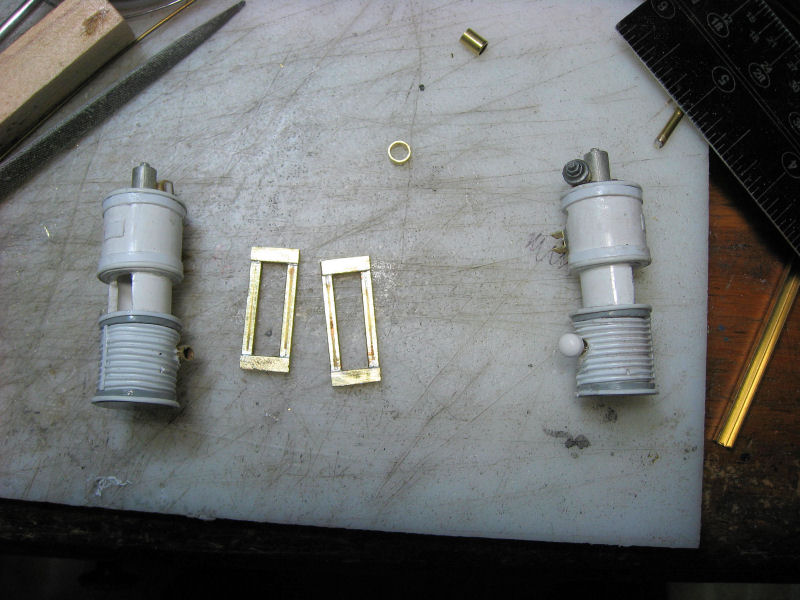
I started with the lifting injectors. These are located on each side of the boiler and are used to bring water from the tender into the boiler. I used various sizes of brass tubing glued together and then covered them with JB Weld, a two part epoxy. A few details are added, and then I use 3/32” rod to represent the pipes.
I made some air tanks by putting some rivets in a sheet of .020” styrene and wrapped this around a piece of ABS tubing. I used brass strips to mount them to the running boards on the boiler.
I made the steam turret out of various pieces of brass. Dress snaps were used to represent the valve handles. The steam turret routes steam to the various appliances, like the generator and the air pumps.
Air pumps were made from bits of ABS tubing. I used some 3/32” T pieces to represent the fins on the lower part of each pump. Square brass tube was used to make brackets to hold the air pumps on the boiler.
A generator was made from some tubing and ends that I cut from my Bachmann Anniversary 10 wheeler. I used a 3/32” brass tube for the exhaust stack.
I used some other styrene pieces to create the brake parts underneath the running board.
A whistle was added to the steam dome, along with a couple of pop valves.
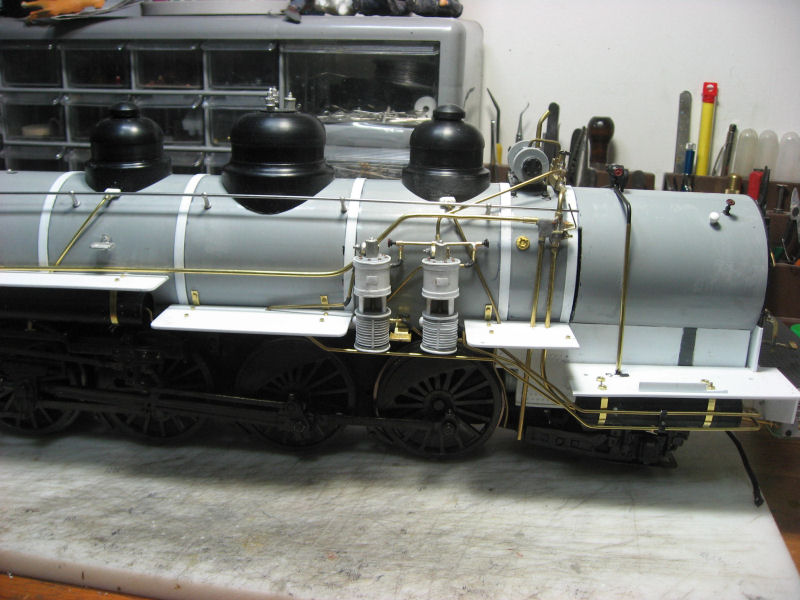
The picture to the left shows the engineer’s side with all of the plumbing in place.
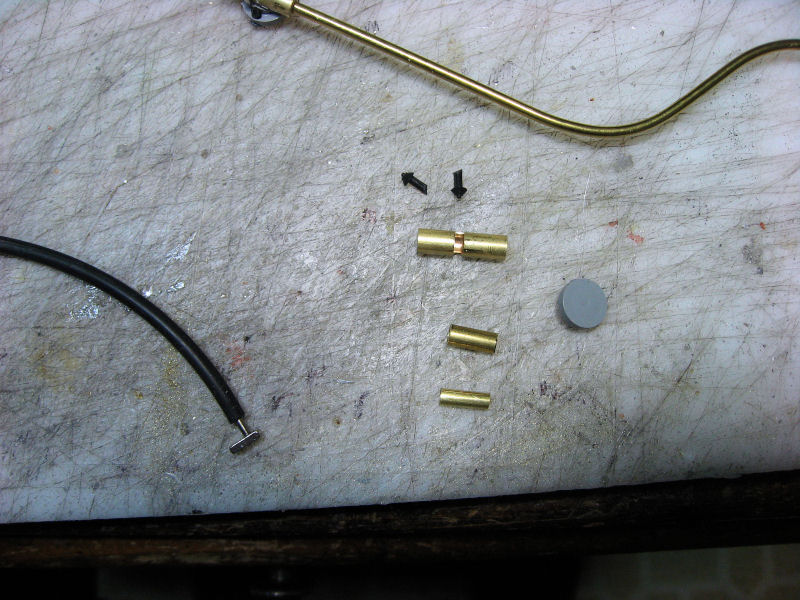
Water lines go from the tender to the lifting injectors on the boiler, but these are seldom modeled. I used various pieces of brass tubing and a small disk of plastic to create the locomotive side piece. A magnet is mounted inside. Black surgical tubing comes from the tender, and it has a small magnet glued in the end. This allows the tubing from the tender to be connected to the brass rod going to the injectors on the locomotive.


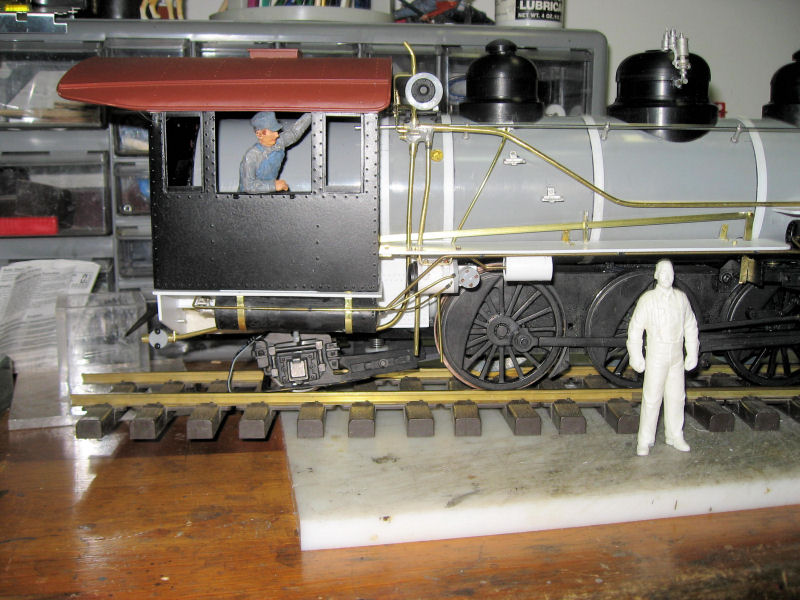
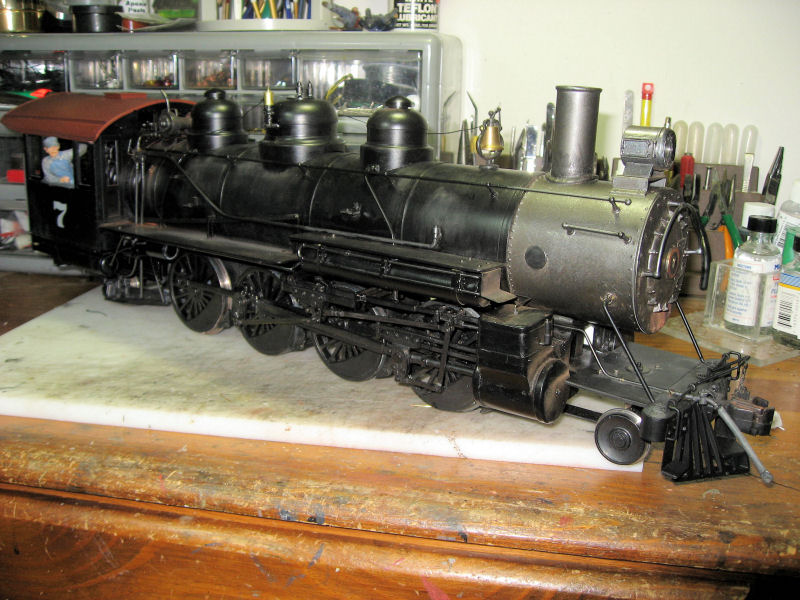
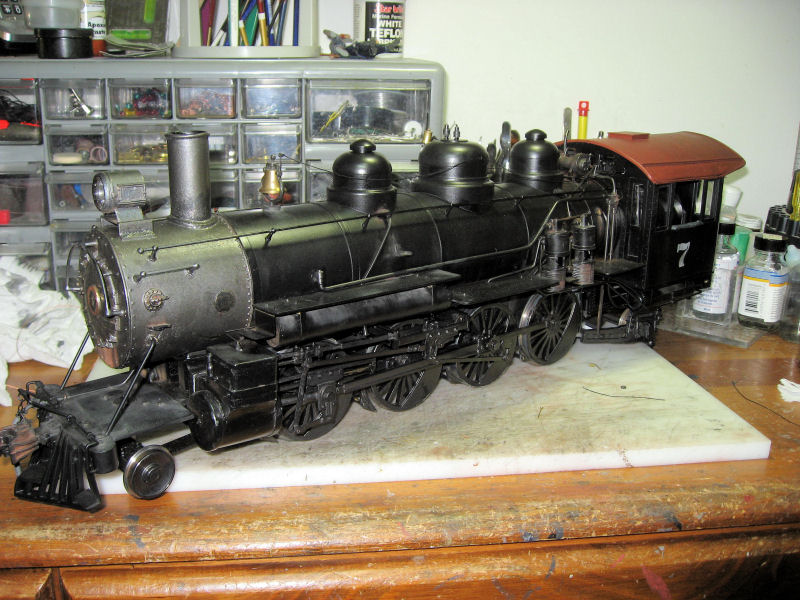
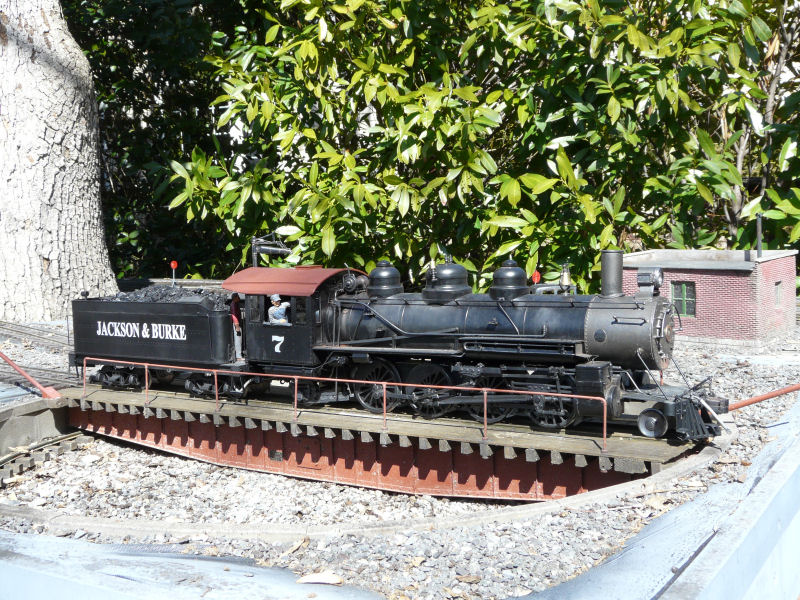
Completed Locomotive