Ventilated - JBRR
Main menu:
- Home
- Locos
- Rolling Stock
-
Structures
- All Structures
- Industries
- Off Layout
- Railroad Property
- Town & Country
- Layout
- Vehicles
- Figures
- Events
- Articles
- What's New?
Ventilated
Ridge Road Station had a sale on AMS Flatcars in January 2009, for just under $30. I bought three of them as I figured it would cost me at least that much for a pair of trucks and couplers.
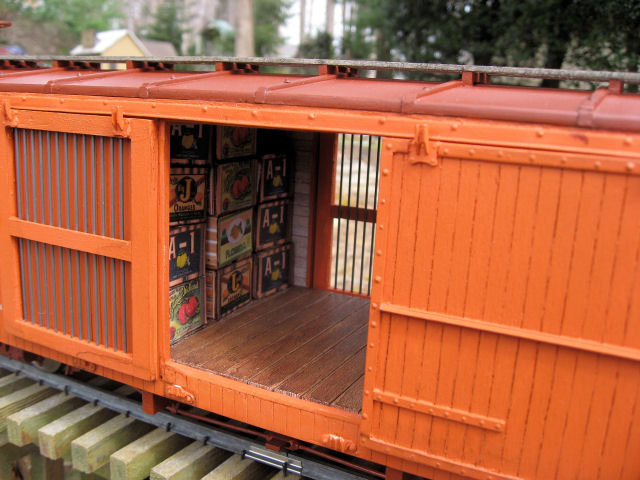
I don’t really like flatcars as it’s pretty obvious when you don’t have a load; I decided I would make something different: a ventilated boxcar. Though there weren’t many in narrow gauge, they were a popular car in the early part of the 20th century and were used to carry fruit and vegetables.

The first step was to remove all of the hardware from the flatcar.
There's some nice brass steps that I'll reuse, as well as the couplers and lift bars.
I cut the rest off by running it through the table saw and painted the top to look less red.

I got some scribed sheets from Ozark and cut them to shape.
Then I used my little Microlux jigsaw to cut the openings.
The vent openings were framed with plastic angle pieces.
I notched the back side of the vents to put in some .047" music wire. I was originally going to use some 1mm brass wire, but I really like the music wire as it doesn't bend as easily. It is quite a bit harder to cut, but at least it doesn't deform when I'm inserting it.

Of course I didn't want to have an empty boxcar.
My next stop was to Ozark Miniatures; they have some free crates that you can print out and assemble. I built some forms out of styrene, some others out of wood, and used spray adhesive to glue the cut out crates to the forms. One caveat; they come four to a sheet of paper and half of the oranges and half of the apples have the lettering reversed -

Next, I started to add the detail parts.
I was going to make ladders, but I looked in my scrap box and I had plenty of grab irons and NB from Phil's Narrow Gauge, and decided to use them instead.
The other parts are made from styrene and some NB that I had on hand.
I used the stirrup steps that I had taken off the flatcar.

I decided that I wanted a Hutchins Steel Roof like this one as shown in the 1924 Car Builders Cyclopedia.

I have a bunch of 1/8" styrene, so I thought I'd use that for the base of the roof.
I glued it on with Welder contact cement and also put some brass pins to hold it in place.
The heads were filed flush after the glue dried. I used 1/4" wide .060" strips for the end pieces and marked lines on 3 foot centers for the other carlines. The dimensions call for 2" wide carlines and I used some .125" x .060" pieces and glued them in place. Finally, some NBW castings were glued in place and roofwalk supports were added.

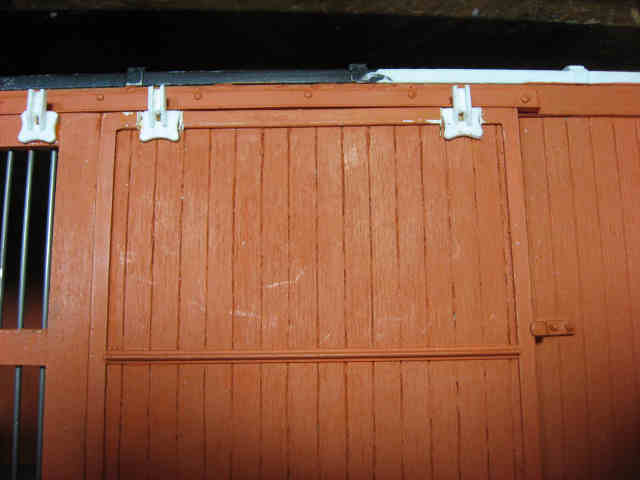
For the doors, I scribed some thin plywood at scale 4” intervals and added some styrene details.
The other doors were made using the music wire.
The car was lettered for Mike Oates’ Chesapeake Western.
Mike has been to numerous operating sessions on the J&B.